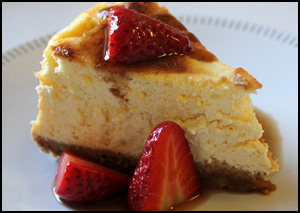
Cheesecake with strawberries and balsamic vinegar
Ingredients
Shortbread biscuits (to be crushed) no need to be the expensive ones
100g unsalted butter
1 tbsp clear honey (runny) a bit more or a bit less is fine
1 tbsp icing sugar (sifted)
1 tsp vanilla extract
500g-mascarpone cheese
Topping glaze
2 tbsp clear honey
1 tbsp balsamic vinegar
400g strawberries
4 small or 1 large loose removable base tin
Method
- Crush the biscuits in to crumbs, Heat the unsalted butter and honey together in a pan and when melted and mixed add the biscuit crumbs, stir well.
- Use 4 metal rings to make small ones, or a 7” or 8” cake tin, divide the crumb mixture between the rings or large tin, press down evenly and firmly, this makes the base. Set aside
- In a bowl mix together the sifted icing sugar, vanilla extract and mascarpone cheese. Spoon mixture on top of the biscuit base and smooth over. Leave to set in the fridge for 5 –10 minutes
- Gently warm the honey and balsamic vinegar together and set aside.
- To serve, place the cheesecake(s) in the centre of the plate(s) and remove from tin, decorate the top with strawberries and spoon over the honey/balsamic glaze.
If you want to spoil yourself double the ingredients (except the strawberries) and use a very deep cake tin still with a removable base, you might have to put greaseproof paper on the inside to get the cheese cake out but well worth the effort, defiantly one to take to friends if your bringing the dessert. Eat, enjoy
Posted in Recipes, beeBlog
|
The larvae were about 12hrs old last Saturday morning when they were placed carefully in the cell bar to be drawn out. Today was the day to see the results. Before i know how many colonies i can split this large queen rearing colony down to i needed to know what i had to work with. On arrival at the hive, the bees were really active and lots of pollen coming in too. With the bees so active it gave me confidence that it was warm enough to split the colony down and not worry about the temperature.
The Cupkit had been placed in the top brood box so it did not take long to get in and have a look. Initially i was disappointed as there were only 2 queen cells from the 10 cups on the cell bar and a large amount of freshly drawn comb. Not a great result, i guess something went wrong, at the moment i can’t think what, still 2 perfect queen cells is better than none. On closer inspection looking through the brood boxes i found the colony had also drawn out a number of other very good size queen cells. I decided to use the best 3 of these as well to make up the new colonies. In fact there is a benefit to using these too as the mother of these is the queen that i originally wanted to use to rear queens. This way i have can have new colonies from two different queens
So i set about breaking down the colony into 5 new smaller colonies, each with a queen cell, 3 frames of brood of different ages and a frame of honey. Rather than taking the queen cells and rearing them in Apidea i wanted to use hives and set up smaller colonies in each one. I hope there is benefit in having 4 frame colonies rather than using smaller Apidea. I want tehm to quickly gain in size over the summer to be stronger going into winter. After all i want colonies and not just a large number of queens.
I should also have found the original queen, after 2 thorough searches i was unable to find her. There were some eggs in the colony so if she was no longer there she was there recently. If she is in one of the splits i guess anything could happen with the colony she is now in, the right result for me is that she will be replaced by the queen hatching from the queen cell.
As i am not using Apidea i have decided i would try a method i have found on the Dave Cushman website, this suggests that the new colonies should be placed in a circle 2-3m wide around the site of the original colony with all the entrances facing inwards. The website suggests that this should result in a fairly even distribution of flying bees across the 5 colonies.
I now have to play a waiting game to see the results. The queens will all be hatching later this week, the ones from the Cupkit will be hatching on Thursday and the others within a day or so. By this time next week they will be ready to fly.
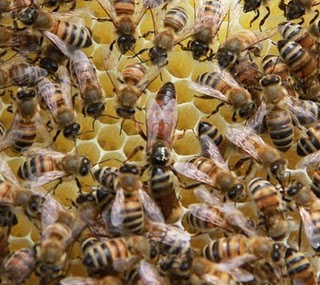
At last I get a proper look at my bees – not great weather, very windy but quite warm and dry. They have begun drawing out all three new frames and, as you can see on the photo below, there is plenty of nectar and I’m pretty sure I saw the queen laying an egg on this one (you can see her at the bottom of the frame). Having watched queen marking and clipping yesterday at the Association beginners session, I decided to have a go and got my queen marked! She seemed to walk off happily afterwards so don’t think I injured her. I didn’t feel brave enough to have a go at clipping her wings though.

Inside my hive
Saw plenty of stores and larvae on all five of the original nuc frames but no eggs (I have never actually seen an egg – not sure my eyes are up to it).

Frame covered in bees
I did see one queen cup – hopefully just a play cup, which I destroyed as I’d seen the queen. All looking good so far!
Discover life on Britain’s Farms – Sunday 12th June 10am to 4pm – Challow Hill Farm, East Challow, Near Wantage on A417 between Wantage and Faringdon
FREE ENTRY TO FARM where there will be a sausage making demonstration, cookery demonstration, meet the animals, nature trail, egg collecting, pet animal feeding, tractor display, sheep shearing, childrens activities, the BIG BALE CLIMB and much more. Fresh Dexter beef and eggs from our free range chickens available to purchase on the day. Refreshments available. Please wear appropriate footwear and remember sun hats if the sun is out.
Posted in News, Shows, beeBlog
|
A much sunnier, calmer day today and the bees are out and about – didn’t spot many in the garden except in the forget-me-nots around the hive.
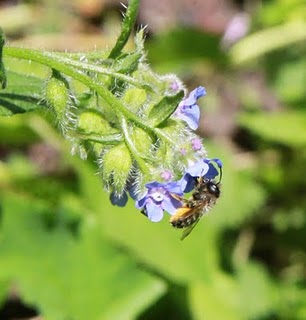
Bee on the forget-me-nots
Took some pictures quite close to the hive and the bees took absolutely no notice of me. Here they are coming in to land:
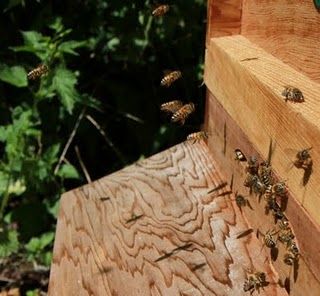
Flying in 24 may 2011
You can see three different colours of pollen in the photo below – almost white on the legs of the bee just going into the entrance, bright yellow on the bee bottom left and dark orange on the one on the right. I tried to check these against the Pollen Identifier tool on the Bristol Beekeepers Association website but not really sure – the whitish may be honeysuckle, the orange Yew, the bright yellow could be oil seed rape (is this still flowering?) But as we live right in the centre of town I didn’t think they’d make it out as far as any farmland for the OSR but perhaps they already have.
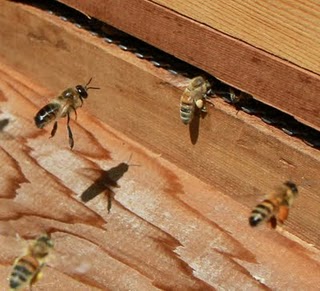
Three different colours of pollen
Getting home at about 12.30pm, I was pleased to see the bees flying in and out of the nuc box, despite the windy conditions. With Mum assisting, I transferred the five frames of bees into the hive. They seemed very good tempered but absolutely bursting out of the seams of the nuc box – an awful lot of bees! I had a quick look but not very thoroughly as it was cold and very windy; no sign of the queen but apparently she is unmarked and unclipped – something we are to practise at the next beginners session on Saturday. Hopefully she was transferred in one piece! I put on a contact feeder of syrup and left them to settle into their new home.

My Hive
I went to check on the hive just a couple of hours later and was thrilled to see bees coming back into the hive laden with pollen; being buffeted by the wind, struggling to land but already working hard!

Homeward bound


